上一篇(WPF自定义控件——图像查看控件(二))处理了缩放的功能,这篇再处理一下移动功能,实现完移动,这个控件就算是能简单使用了
移动可以分为两个动作,分别是鼠标左键按下和拖拽,按下标记允许移动,抬起更改为不允许移动,按下时记录下鼠标指针位置_imgMouseDownPoint和当前的ImageMargin
/// <summary>
/// 准备拖动时使用,鼠标按下位置
/// </summary>
private Point _imgMouseDownPoint;

/// <summary>
/// 在图片上按下时的偏移
/// </summary>
private Thickness _imgMouseDownMargin;

/// <summary>
/// 是否按下(移动中/准备移动)
/// </summary>
private bool _isImgMouseLeftButtonDown;

public override void OnApplyTemplate()
{
    base.OnApplyTemplate();
    _image = GetTemplateChild(ElementImage) as Image;
    _imgPanel = GetTemplateChild(ElementPanel) as SimplePanel;
    if (_image != null) _image.MouseLeftButtonDown += OnImgLeftButtonDown;
    if (_imgPanel != null) _imgPanel.MouseLeftButtonDown += OnImgLeftButtonDown;
}

private void OnImgLeftButtonDown(object sender, MouseButtonEventArgs e)
{
    _imgMouseDownPoint = Mouse.GetPosition(_imgPanel);
    _imgMouseDownMargin = ImageMargin;
    _isImgMouseLeftButtonDown = true;
}

protected override void OnPreviewMouseLeftButtonUp(MouseButtonEventArgs e)
{
    base.OnPreviewMouseLeftButtonUp(e);
    _isImgMouseLeftButtonDown = false;
}

protected override void OnMouseLeave(MouseEventArgs e)
{
    base.OnMouseLeave(e);
    _isImgMouseLeftButtonDown = false;
}
起一个函数用于移动,移动比较简单,只需要将移动时的偏移加到ImageMargin就行
        private void MoveImg()
        {
            _imgCurrentPoint = Mouse.GetPosition(_imgPanel);
            //未按下,不能移动
            if (!_isImgMouseLeftButtonDown)
                return;
            //图片尺寸小于等于容器尺寸不移动
            if (ImageWidth < ActualWidth && ImageHeight < ActualHeight)
                return;
            //X、Y方向上的位移
            var offsetX = _imgCurrentPoint.X - _imgMouseDownPoint.X;
            var offsetY = _imgCurrentPoint.Y - _imgMouseDownPoint.Y;

            var marginX = _imgMouseDownMargin.Left + offsetX;
            var marginY = _imgMouseDownMargin.Top + offsetY;

            //最终通过margin的左、上边距体现移动
            ImageMargin = new Thickness(marginX, marginY, 0, 0);
        }
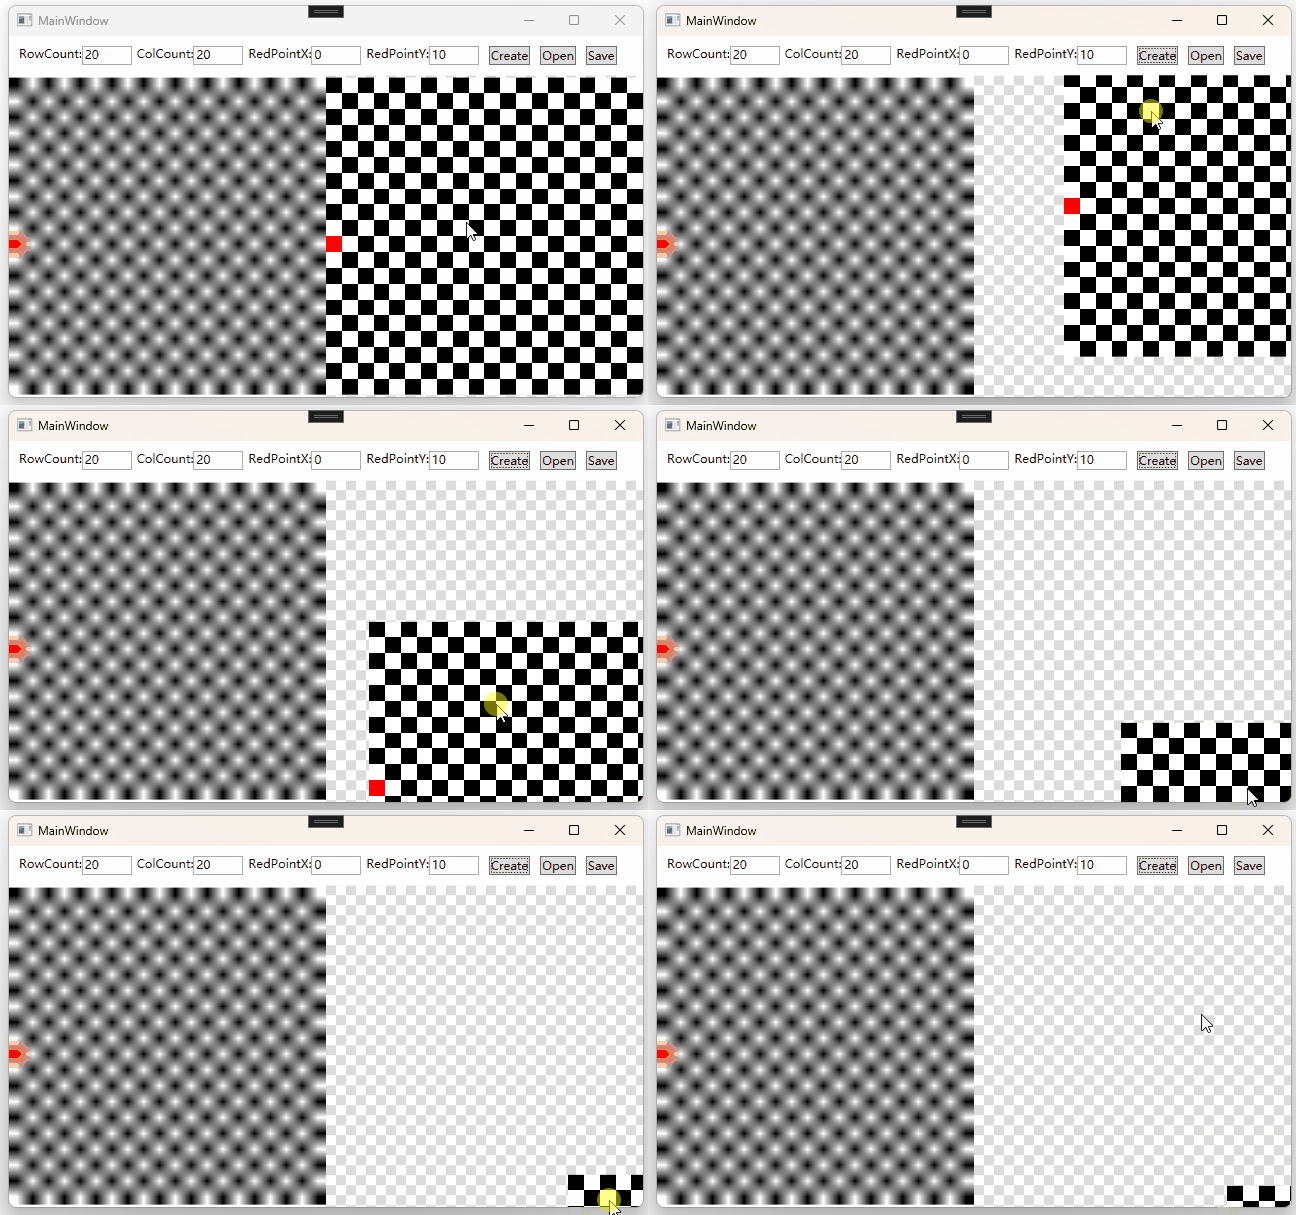
效果如下

这里还遗留了一个问题——图像可能会被拖拽到容器看不到的地方,ImageViewer的原则是图像尽可能填充整个容器,以免出现用户不可操作的情形,因此这里再做一点限制,拖拽时图像边缘与容器边缘相接时不再移动
/// <summary>
/// 移动时使用,当前位置
/// </summary>
private Point _imgCurrentPoint;

private void MoveImg()
{
    _imgCurrentPoint = Mouse.GetPosition(_imgPanel);
    //未按下,不能移动
    if (!_isImgMouseLeftButtonDown)
        return;
    //图片尺寸小于等于容器尺寸不移动
    if (ImageWidth < ActualWidth && ImageHeight < ActualHeight)
        return;
    //X、Y方向上的位移
    var offsetX = _imgCurrentPoint.X - _imgMouseDownPoint.X;
    var offsetY = _imgCurrentPoint.Y - _imgMouseDownPoint.Y;

    //起始偏移X(鼠标按下时的偏移)
    var marginX = _imgMouseDownMargin.Left;
    //起始偏移Y
    var marginY = _imgMouseDownMargin.Top;

    //图像宽度大于容器宽度,允许左右移动
    if (ImageWidth > ActualWidth)
    {
        marginX = _imgMouseDownMargin.Left + offsetX;
        //贴着左边缘
        if (marginX >= 0) marginX = 0;
        //贴着右边缘
        else if (marginX <= ActualWidth - ImageWidth) marginX = ActualWidth - ImageWidth;
    }

    //图像高度大于容器高度,允许上下移动
    if (ImageHeight > ActualHeight)
    {
        marginY = _imgMouseDownMargin.Top + offsetY;
        //贴着上边缘
        if (marginY >= 0) marginY = 0;
        //贴着下边缘
        else if (marginY <= ActualHeight - ImageHeight) marginY = ActualHeight - ImageHeight;
    }
    //最终通过margin的左、上边距体现移动
    ImageMargin = new Thickness(marginX, marginY, 0, 0);
}
成了,看看效果
